Good news folks, yes there is! This guide will show you how to use the stock Email app on Android with your Student Mail. However, be aware that this causes the Email app to need very excessive permissions, as you can see below.
If you don't want to give the Email server these permissions, check out my other guide here.

If you're OK with that, then we can proceed. You need to navigate to Settings - "Add Account" - Corporate. At this screen, type in your Student Mail login details, and tap "Next", and then "Exchange".
At the "Account setup" screen, change the "Server" address to "pod51002@outlook.com". Then tap "Next".

Before editing
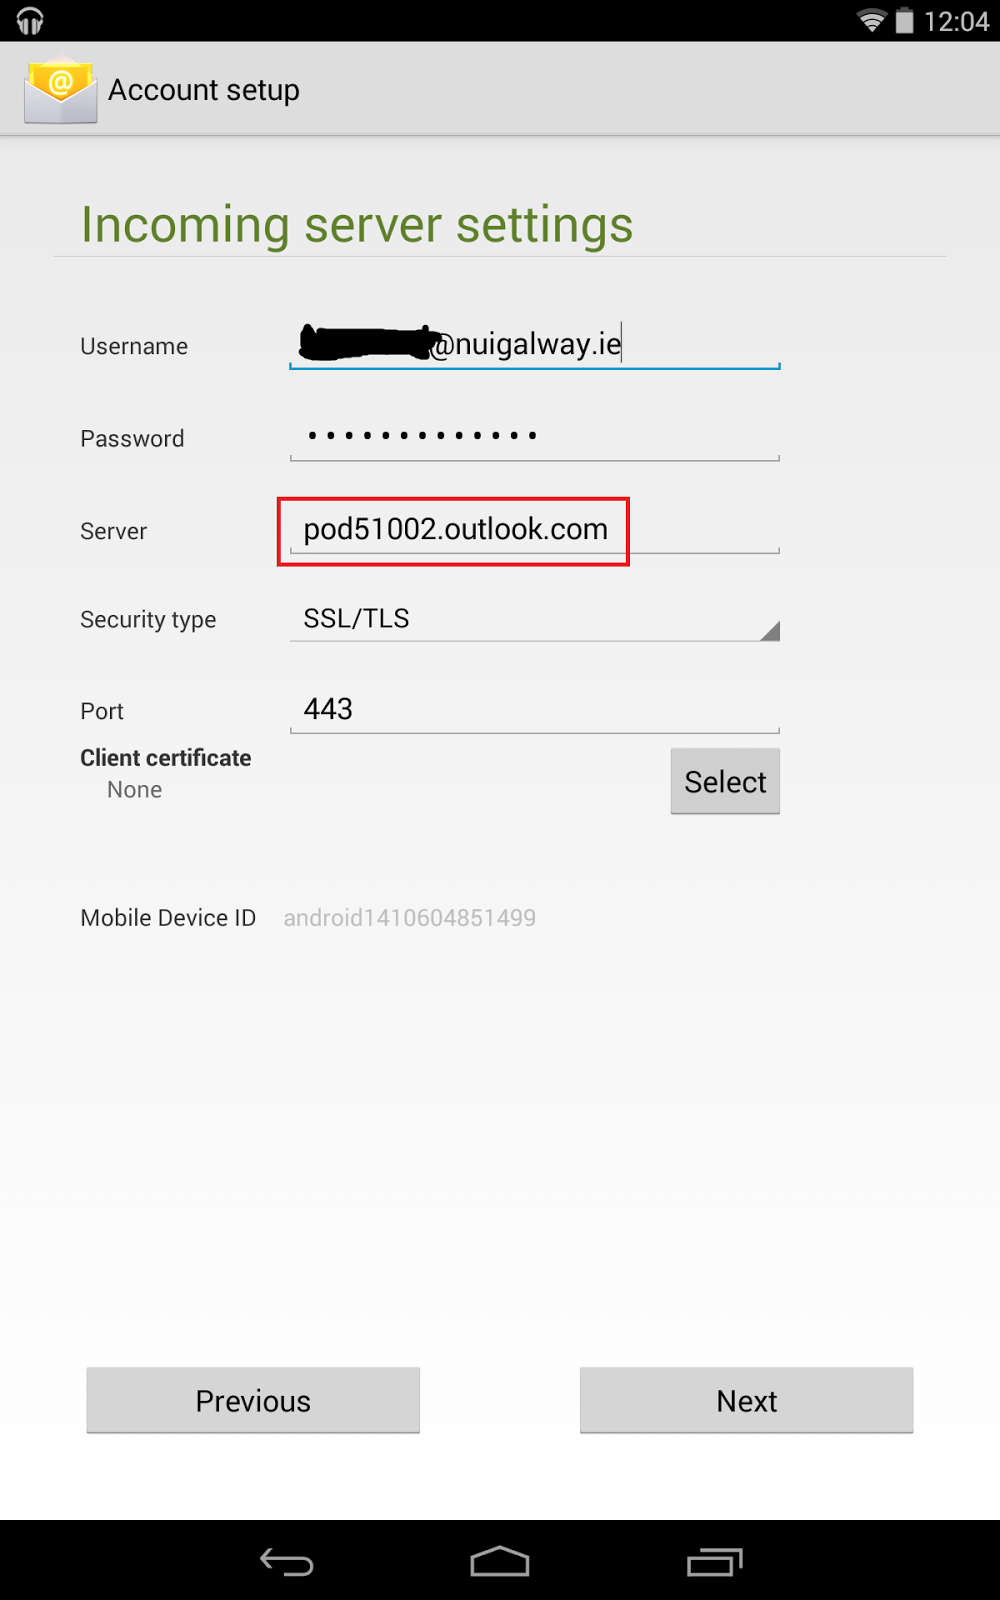
After editing
You will then be prompted about "Remote security administration". You need to accept this to enable Student Mail using the Email app.
Decide how, when, and what you want to notified about, and tap "Next". If you want, you can then name the account, This is completely optional. Tap "Next".
You will then be prompted to activate the Email app as a device administrator, which is where you can see how excessive the required permissions are. Assuming this is acceptable to you, scroll to the bottom of the permissions and tap "Activate".
That's it! You can now check your Student Mail through the stock Email app.
No comments:
Post a Comment